Skip to content

ROBADLERS.COM

My Byte On The Internet

  • Blogs
    • The Radlers Biking Blog
    • Rob’s Computer Room Blog
    • Rob’s Life Blog
    • Rob’s Media Blog
    • Rob’s Repair Shop Blog
    • Rob’s Studio Blog
    • Rob’s Workshop Blog
  • Music
  • Media
    • The Shows
      • Opening For The Watch
    • The Repair Shop
      • Hammond L-112
      • Hammond M3-A4
      • Moog Prodigy
      • Sequential Circuits Pro One
      • Shaw Shavian Opus 22 Organ
      • Wurlitzer 200A Electric Piano
      • Yamaha CS10
      • Yamaha SK15
  • Webmastering
  • Toggle search form

Rob Adlers’ Toybox Synthesizer Project

Posted on October 20, 2011March 3, 2023 By Rob Adlers

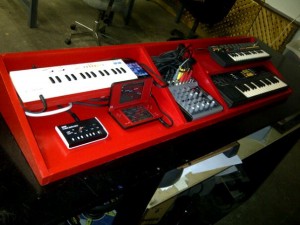
I’ve collected toy synthesizers and toy wood pianos over the years, and occasionally brought them to gigs to use as solo instruments, but for the most part they lived in a drawer in my studio, making an appearance now and then to be used. I always wanted to put them all together, using a common power source, and to have them in a portable form to take them wherever I want. The result was the Toybox Synthesizer.

First I started by trying different layouts for the keyboards and mixer to better understand how I should put them together.

Toybox Synthesizer - Layout Experiments - 2
Toybox Synthesizer - Layout Experiments

The above two photos revealed that my ‘church organ’ layout would be too deep an high. I eventually measured out my Korg M50 (88 key) keyboard body and drew up a layout with keyboards on either side of the mixer. In the end, the measurements were similar to the M50 just narrower – 4 foot width which worked really well on an A frame keyboard stand.

Next, get the wood pieces cut and put them together.

toybox1

Then, like with car customization, I placed all the pieces in place to see how they all laid out.

toybox2

Then began the verathane application to add some rigidity to the plywood and protect it from minor dings when moving it about.

toybox3

Sanded, body filler, etc. done, I then spray painted the case.

toybox5
toybox4

Then it was time to start laying everything out on the painted case.

toybox6

Mounting in the stereo 1/4″ jacks and power plug as well as power bar inside went in.

toybox7

Then, finishing up by wiring up all the keyboards with power and audio cables into the mixer and then out to the 1/4″ jacks.

And plugging it in and trying it out.

Toybox Synthesizer
toybox9

Last but not least, painting the keyboard label on the body.

toybox10

Final component list:
Realistic Concertmate 300 (Casio PT-1)
Casio SA-1 (circuit bent)
Realistic Concertmate 800 (Casio SK-8)
Korg Monotron
Nintendo DSi with Korg DS-10 +
Location and connection for iPod touch for music software
Behringer Xenyx 1204FX mixer (with effects)

Rob's Studio Blog, Rob's Workshop Blog Tags:Behringer Xenyx 1204FX mixer, Casio PT-1, Casio SA-1, Casio SK-8, Circuit bent, Concertmate 300, Concertmate 800, custom keyboard case, Korg DS-10+, Korg Monotron, making, Nintendo DSi XL, Radio Shack, Realistic, Rob Adlers, Toybox Synthesizer, www.robadlers.com

Post navigation

Previous Post: Yamaha SK50D Synthesizer – The Pedals
Next Post: Restoring a Hammond L-112

Related Posts

Hammond M3 – Remember To Oil Them! Rob's Repair Shop Blog
Toy Synthesizer Case – ToyBox – Video on YouTube Rob's Media Blog
Restoring a Shaw Shavian Opus 22 Organ Rob's Repair Shop Blog
New Addition – 1942 Heintzman ‘Louis XVI’ Styled Piano Rob's Studio Blog
Reclaimed wood snowblower shed I Made This! Building a Snowblower Shed Rob's Workshop Blog
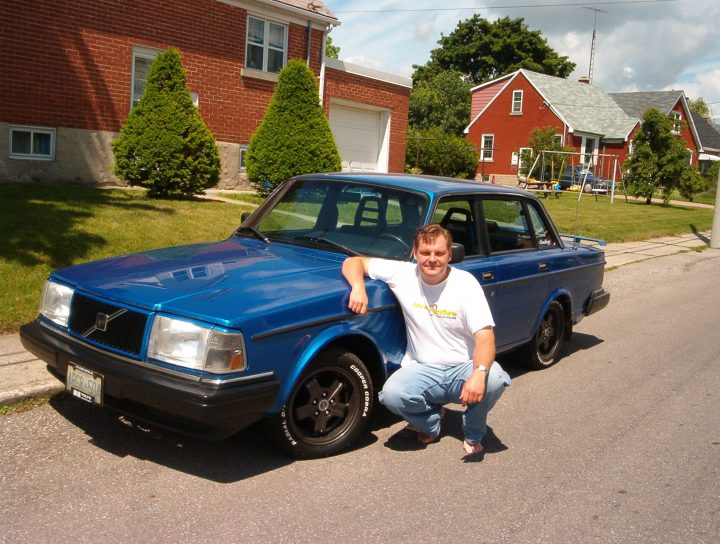
1986 Volvo 240DL Volvo 240DL Customization Rob's Workshop Blog
  • Rob's Computer Room Blog
  • Rob's Life Blog
  • Rob's Media Blog
  • Rob's Repair Shop Blog
  • Rob's Studio Blog
  • Rob's Workshop Blog
  • The Radlers Biking Blog

Copyright © 2025 ROBADLERS.COM.

Powered by PressBook Masonry Dark