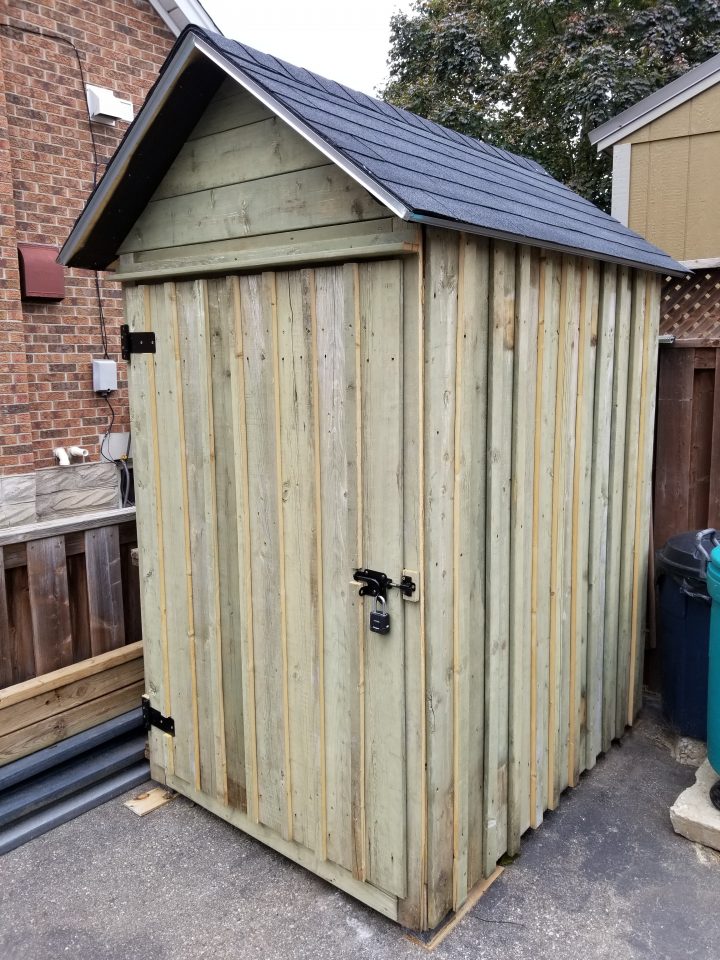
I never logged this project anywhere formally, so here we go.
In 2021, I had a need to build a second shed to store winter tires and my snowblower. I was running out of room in my main shed, and I didn’t have the budget to build a monster shed, so what to do?
Build a snowblower storage shed from reclaimed pressure treated wood!
Had I done this before? No.
Did I understand the basics required to build a shed? Yes
Did I have the tools to build the shed? Yes
Let’s do this!
Obtaining The Materials
Reclaiming wood for projects is a popular thing to do these days. During the COVID-19 outbreak, many people were stuck at home, and restoring decks and yards became popular. So much new materials became unavailable and the prices went way up.
Old pressure treated wood became available as a result. A lot of this wood was in good shape, just weathered, and part of a larger build that had aged to the point of needing replacement.
So, the hunt was on using Kijiji and Facebook Marketplace.
I picked up as much as my neighbour and I could haul on his flatbed trailer and in my SUV, until I was satisfied I had enough materials to build out the shed.
Scores:
Pressure treated decking, posts and boards, and several composite boards. All free!
Designing The Shed
I had an idea of the type of shed I wanted to build. Board and batten side walls and door, and a regular peaked roof.
I measured the biggest tools I wanted to store in the shed. At that time, the snowblower and the lawn mower. Later the lawn mower was replaced by winter tires.
I also needed a ramp to get the snowblower in and out of the shed, as the shed needed to be up off the ground to prevent rotting.
Since I had composite board, one of the 2×4 boards was cut up to make feet for the shed, to prevent transfer of moisture from the ground to the shed frame.
I then took a look at the materials I had collected to see what could be used where. In the end, the 2×6″ boards became the frame for the shed. I had to buy roofing materials and hardware, but I had everything else!
Preparing the Reclaimed Wood
Part of using reclaimed wood, is discarding the pieces not fit for the project, removing nails and screws, and cleaning up the wood. Out came the drill, hammer, sander and pressure sprayer. Then cutting of the boards in preparation for assembly. I was pretty spot on with the measurements, which I was quite happy about. Another thing with reclaimed wood that was used outdoors… not everything is straight. You’ll have bows, twists and bends to contend with when building out.


Building The Shed
I had to learn about building a frame that was level / squared up online. Most of my education came from YouTube. Shingling the roof was instruction from my neighbour Doug, since he had done this many times before. Before anyone wants to comment, I had the aluminum over top the tar paper. I corrected that before putting on the shingles! Tools I used the most for the build? Drill, mitre saw, table saw, hammer, level. This took about 3 weeks of after work time with gaps when it rained out. I think it was about 12 hours in total.


It’s Finished!
Here are pictures of the final shed appearance! I will be sanding down the wood in the future and staining it. The snowblower is backwards in this picture. It isn’t like that normally. I was testing something out related to getting the lawn mower out of the shed. In the end I swapped it out with our SUV’s winter wheels, and the lawn mower is stored vertically in the other shed. I also have moved it off the driveway, and parked it beside the other shed, which gives us more driveway usage and looks a little cleaner on the property. I am very proud of this accomplishment. I also gained a huge amount of respect for trades people who do this on a daily basis, as you really start to understand where they figure out efficiencies in their processes to do things consistently and quickly. That only comes from doing the work.
Total cost for this project? $400 in materials + gas money


